Appearance
Create a new Vendor
This article guides you through the process of creating a new Vendor end-to-end.
What is a Vendor
A vendor, in the context of AI governance, is an external entity that provides AI-related products, services, or components to your organization. Managing vendors is crucial for maintaining oversight of your AI supply chain and ensuring compliance with relevant regulations and standards.

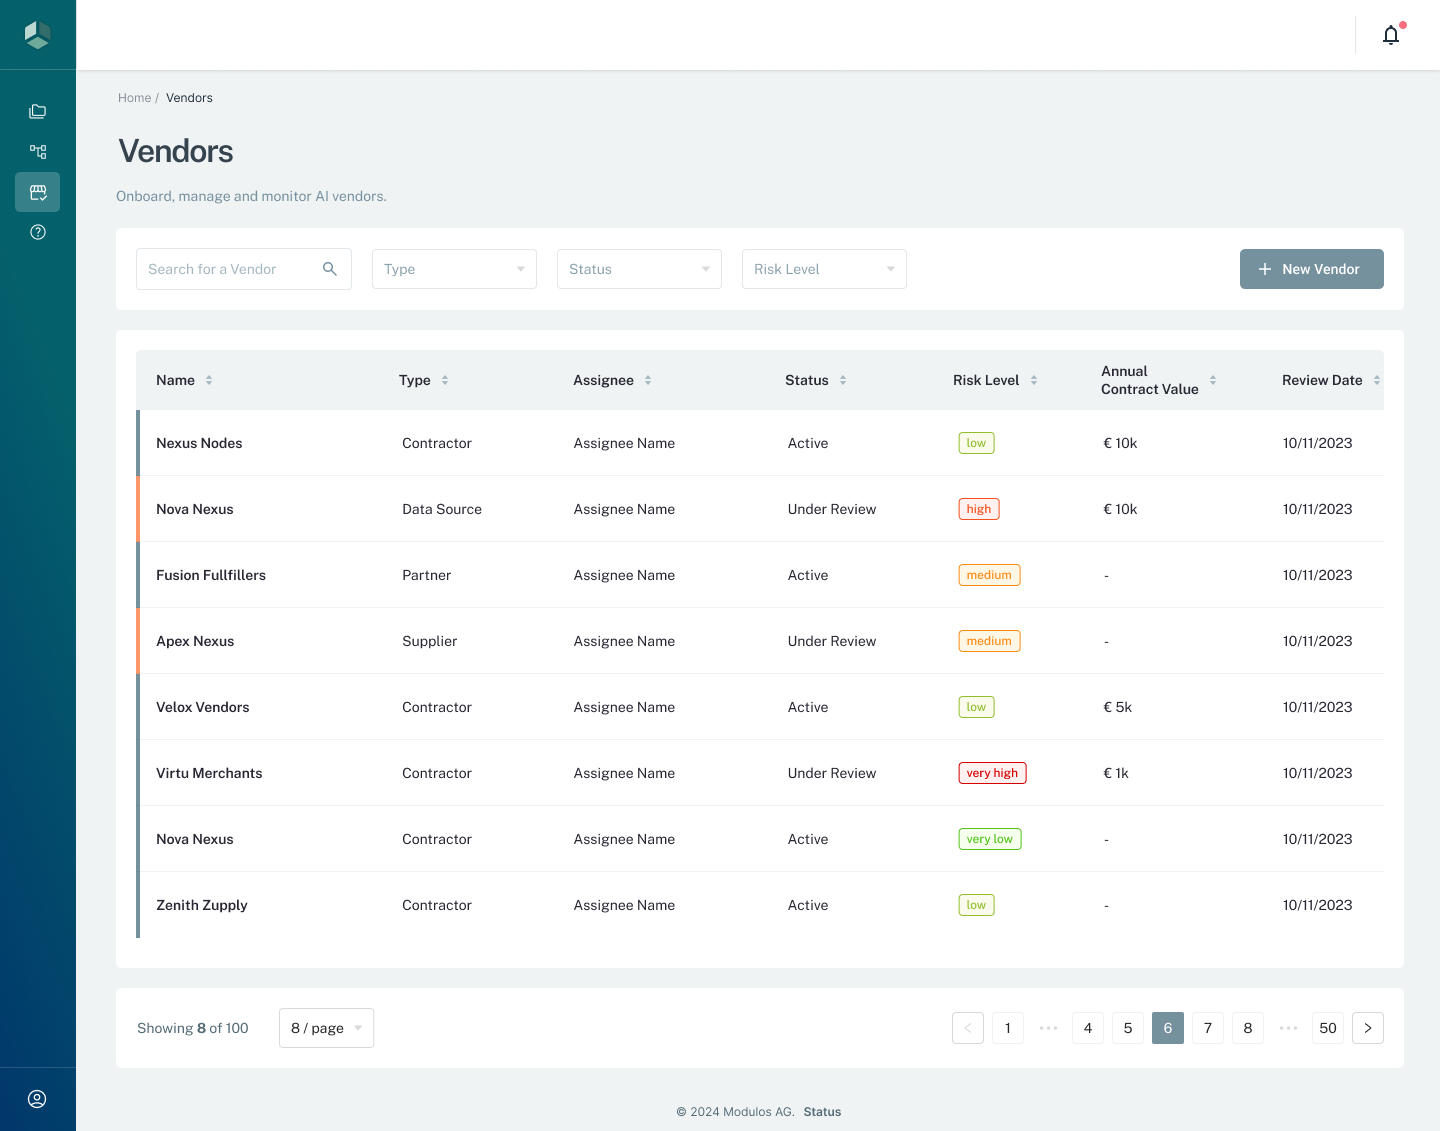
Vendors Overview
Vendor Creation Steps
To help you get started on vendor management in Modulos, this example walks through the process of creating a new Vendor.
- Access the Vendors section
- Initiate new Vendor creation
- Fill in Vendor details
- Assess Vendor risk
- Attach relevant documents
- Review and finalize
Requirements
- You’re logged into the Modulos platform
- You have access to the Vendors section and you're assigned the appropriate role to create vendors
Example: Adding an AI Model Provider
Let’s walk through the process of adding a new vendor that provides pre-trained AI models to your organization.
Step 1: Access Vendors Section
- Navigate to the Vendors section from the main menu (sidebar)
- Click on the Vendors tab to view the Vendors overview
Step 2: Initiate New Vendor Creation
- Click on the + New Vendor button in the top right corner of the Vendors overview page
- This will open the new vendor creation form
Step 3: Fill in Vendor Details
- Enter the vendor’s name in the Vendor Name field
- Provide a brief description of the vendor’s services in the Description field
- Set the Annual Contract Value for this vendor
- Choose the appropriate Vendor Type from the dropdown menu (e.g., "AI Model Provider")
- Set the Next Review Date for this vendor relationship

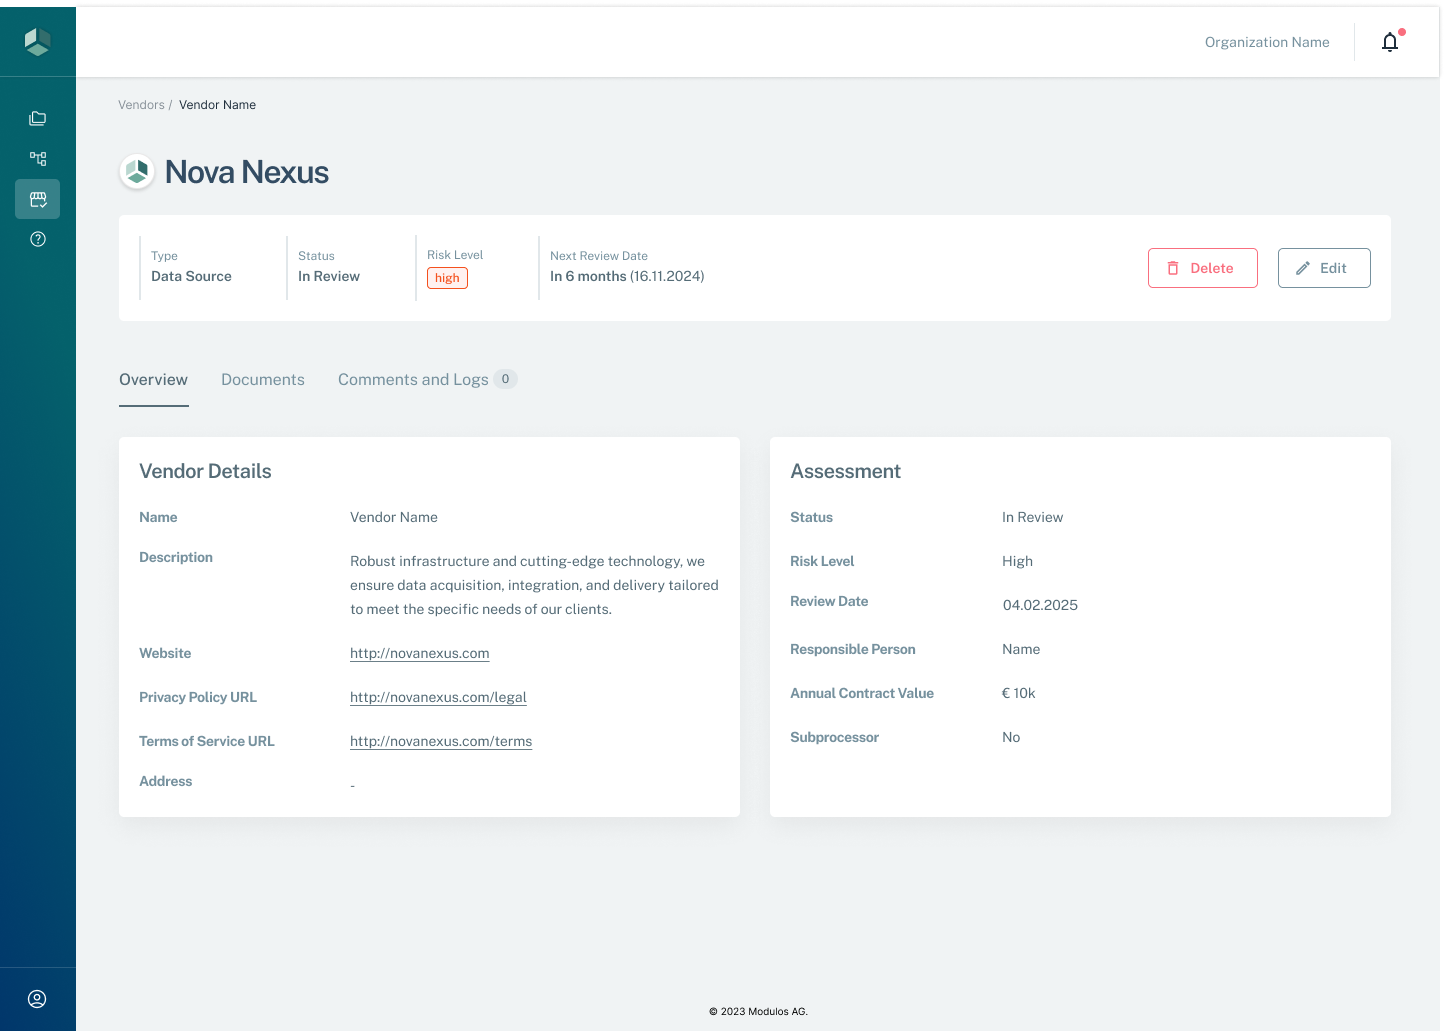
Vendor's detail page
Step 4: Assess Vendor Risk
- In the Risk Level section, select the appropriate risk level for this vendor (e.g., Low, Medium, High)
- Provide a brief justification for the chosen risk level in the Risk Justification field
Step 5: Attach Relevant Documents
- In the Documents section, click on + Add Document
- Choose the document type (e.g., "Contract", "Due Diligence Report")
- Upload the relevant file
- Repeat this process for all necessary documents
Step 6: Review and Finalize
- Review all the information you’ve entered for accuracy
- If everything is correct, click on the Create Vendor button at the bottom of the form
- If you need to make changes, edit the relevant fields before creating the vendor
Remember, you can always edit vendor details later by accessing the vendor’s detail page from the Vendors overview.